 It turned out AMAZING! It really added the pop of color to the room that she was looking for. It was really simple and we had a lot of fun doing it.
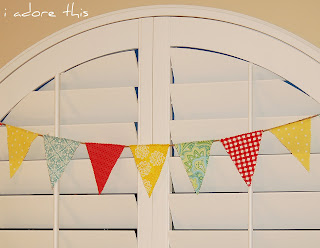 We didn't even use a sewing machine! Here is a quick tutorial on how to make your own pennant banner:
1-Find some awesome fabric
2-Get a ruler and a piece of card stock paper and make a triangle the size you like.
3-Cut the fabric using the paper pattern you just made.
4-I used pinking shears to go around the edges of the triangles. This helps keep the fabric from fraying, and adds a fun bit of texture to the fabric.
5- get out the hot glue gun and glue those bad boys on! We used jute, but depending on the look you are going for you could use anything. Ribbon, ric-rac, or even rope.
6-Hang it up and enjoy!
 We decided that the room needed a big tree. So what did I do? Yep- I painted one right on the wall! My friend was a little nervous I think, but willing to give it a try. (the vinyl ones we found were SUPER expensive!) Her husband had access to a projector at work, so we had him bring it home. I painted trees on my own wall free hand, but I was too scared to do that on hers. So we found an image of a tree that we loved, and projected it onto the wall. Then I traced it, and then painted it. It took about 4 coats of paint, but it turned out great! I adore this!
OH my heck I love this! Also helps that I love Amy... you guys did a good job! :)
ReplyDeleteohhhh Mind! THANK YOU so so so much for your help! these pictures are SO CUTE and Hai was so excited to see her room on your blog (+so happy because she knows I will never get around to getting them on my blog :)
ReplyDeleteyou are super great and I seriously appreciate you SO MUCH!!! x0x0x0